

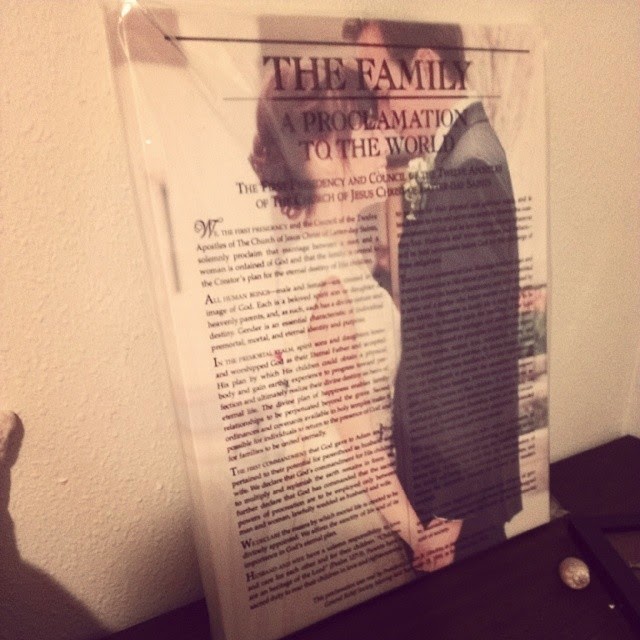
 I had this printed on canvas at Costco, it's 20" by something else that I don't know... I recommend printing at Costco! Prices at Walgreens were outrageous, and quality at Walmart was pretty low. So Costco it is. I had this ordered on a Thursday, and it was ready for pick up by Tuesday, so turnover is pretty great, though it can take up to 10 days. You do need a Costco card to do this, but if you don't have one, ask a friend maybe ;) It's a lovely addition to our home, now just find a place to hang it.
I've had a TON of people message me asking how to make this, so here's a tutorial.
(EDIT: This tutorial can also be used to put any kinda words over a picture, if you've got two images of whatever. You can put all kindsa things together.)
FIRST, in the tutorial, I'm working with really small image sizes because it makes my computer happier to work quicker. Large image sizes will slow your computer down, but you want something large if you're gonna print it. I was using like.... 5000px images and larger.
You can download the Proclamation image here.
I like to use paint.net which you can download here. It's a free photoshop tool. I know people make these using Adobe Photoshop but that costs and I'm terrible at using it, so I like paint.net.
First things first, open you two pictures in paint.net! You'll see them both appear in the top right hand corner.

First you'll want to use the clicky-mouse tool. (Real technical, eh?) That's the little blue mouse tool. Found right here.


Notice the dots around the outside of the picture? This makes it so you can copy the whole picture. You can right click to copy or you can just Ctrl-C, which I like to do. This will copy it to your clipboard so now you're ready to work on the background picture... so click the background picture in the top right hand corner.


Now there's two layers on your picture, like adding clear paper over your paper so you can draw on the clear piece without really changing anything on your real picture. You can now Ctrl-V or right click paste the Proclamation on now.

Like that. Notice in the layer box there's two layers, and the Proclamation is in the second layer. Some of you might get an error box kinda like this...

Your image sizes aren't compatible! One is two big! Actually, some of you might find that when you paste the proclamation, it looks like a tiny little picture. So let's make our images the same size. First, hit Ctrl-R to remove the proclamation image you just posted.
I like to keep the width the same. So find the size of the larger image, and change the size of the smaller image to fit the larger one. For me, the Proclamation was the larger image, so I'm gonna check the size of it which you can find in the low right hand corner.

I notice that the width (the first number) is 919, so that's what I want the width of my background picture to be. I click back to the background picture and hit Ctrl-R which will open the resize box.


Now see that little tag thing with a pencil on it? You're gonna click that, and a box like this will come up.

We're gonna change the blending mode on it.

Click the drop down arrow on that box, and change it from normal to multiply, then hit OK!

You're almost done. Now we want to merge the layers, because like I said, we've got kinda two separate sheets of paper here, and we want just one. Soooo....

See the thing that's like two boxes with an arrow? Click that.

It merges your layers into one so now you have a nice picture. Save it, print it, whatever, you're good to go.
AAAANNNDDDD maybe some of you are gonna be all like "I'm still confused..." and that's ok. Click over to my contact page where you'll find my email, send me a high resolution image that you want as the background. (Like.... 2000px or larger) and I'll make you one asap for a sweet deal!
Pin me!

4 comments:
Love this tutorial! Hopefully more people can make them now!! And I think yours turned out PERFECT. I love it! :) Also, I love your blog design, it looks so good!
Most excellent :) Gonna use this with song lyrics or something. Also, THANK YOU for not using super technical lingo, I never understand that nonsense when other bloggers make tutorials! :D
Once you get it printed on canvas, how do you hang it up? Is there a little hook or something on the back?
Hey Amanda! Check with the place you get it printed, but at Costco they've got hooks on the back!
Post a Comment